Designing a ClickHouse® table involves more than defining columns. Data types, sorting keys, partitioning, MergeTree configuration, indexes, and other settings can influence how the table performs as data grows.
Writing the complete DDL manually gives you control, but it also means translating each design decision into the correct ClickHouse syntax.
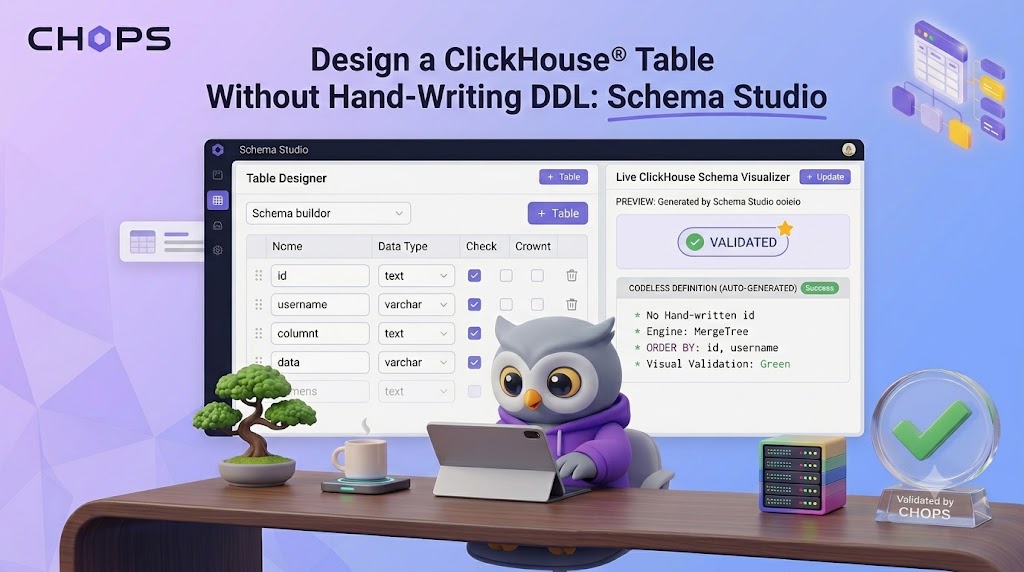
Schema Studio simplifies this process by providing a guided workflow for designing and creating ClickHouse tables while keeping the generated SQL visible and editable.
What is CH-Ops?
CH-Ops is a browser-based operations platform for ClickHouse®. It brings common database operations into a single web interface, including SQL querying, cluster monitoring, user management, backups, alerts, dashboards, and other operational workflows.
Alongside these operational capabilities, CH-Ops includes Schema Studio, a SQL tool designed to simplify the process of building ClickHouse table definitions from source data.
Introducing Schema Studio in CH-Ops
Schema Studio is a guided table-design feature within CH-Ops. Starting with your source data, it helps infer and refine the schema, configure ClickHouse-specific table settings, generate and validate the DDL, optionally review the design with AI, and create the table.
Importantly, Schema Studio creates the table structure only. The source data is used for schema inference and is not loaded into the newly created table.
You can access it under SQL Tools > Schema Studio.
Building a ClickHouse Table with Schema Studio
Schema Studio organizes the table-design process into four core stages:
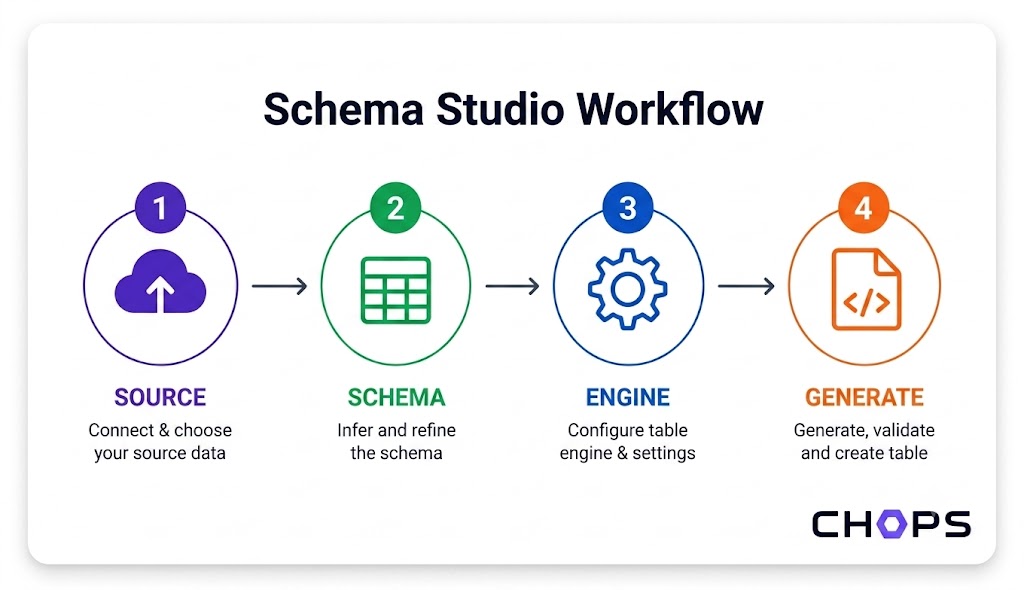
Each stage focuses on a specific part of the design, starting with understanding the source data and ending with a validated table definition ready to be created in ClickHouse.
1. Start with Your Source Data
Schema Studio first connects to the ClickHouse® instance selected in CH-Ops. Enter the ClickHouse username and password to establish the session.
 Connecting Schema Studio to the selected ClickHouse® instance.
Once connected, choose the data that will be used for schema inference. You can upload a local file in formats such as CSV, TSV, JSON, NDJSON/JSONL, Parquet, and ORC, or configure an object-storage source such as S3 or Azure.
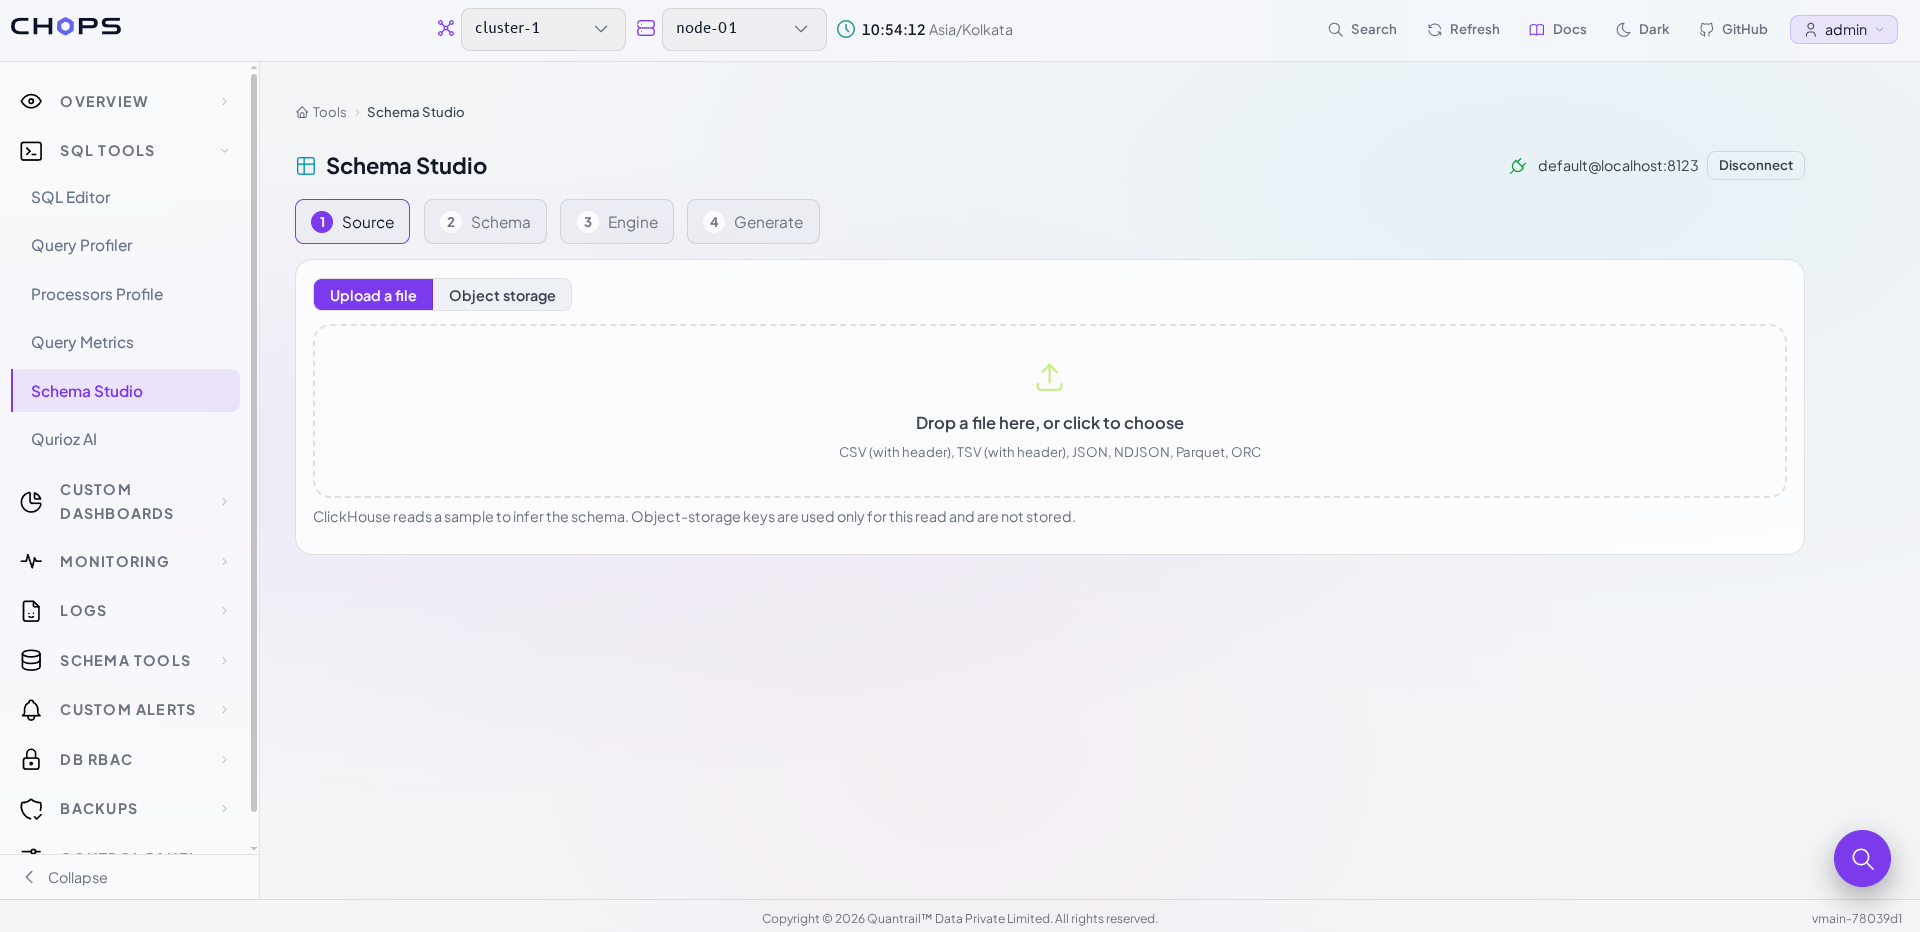
Selecting a local file or object-storage source for schema inference.
2. Review and Shape the Schema
After analyzing the source, Schema Studio displays the inferred columns and corresponding ClickHouse data types. It also shows approximate distinct values and null percentages, helping you review the structure before moving to the table configuration.
The inferred schema remains editable. You can modify column names and data types, add derived columns using DEFAULT, MATERIALIZED, ALIAS, or EPHEMERAL, and configure additional column options such as codecs and comments.
Note : Schema inference may produce nullable types such as
Nullable(Int64). Review the inferred types before configuringORDER BY, and adjust the type if a nullable column needs to be used as the sorting key.
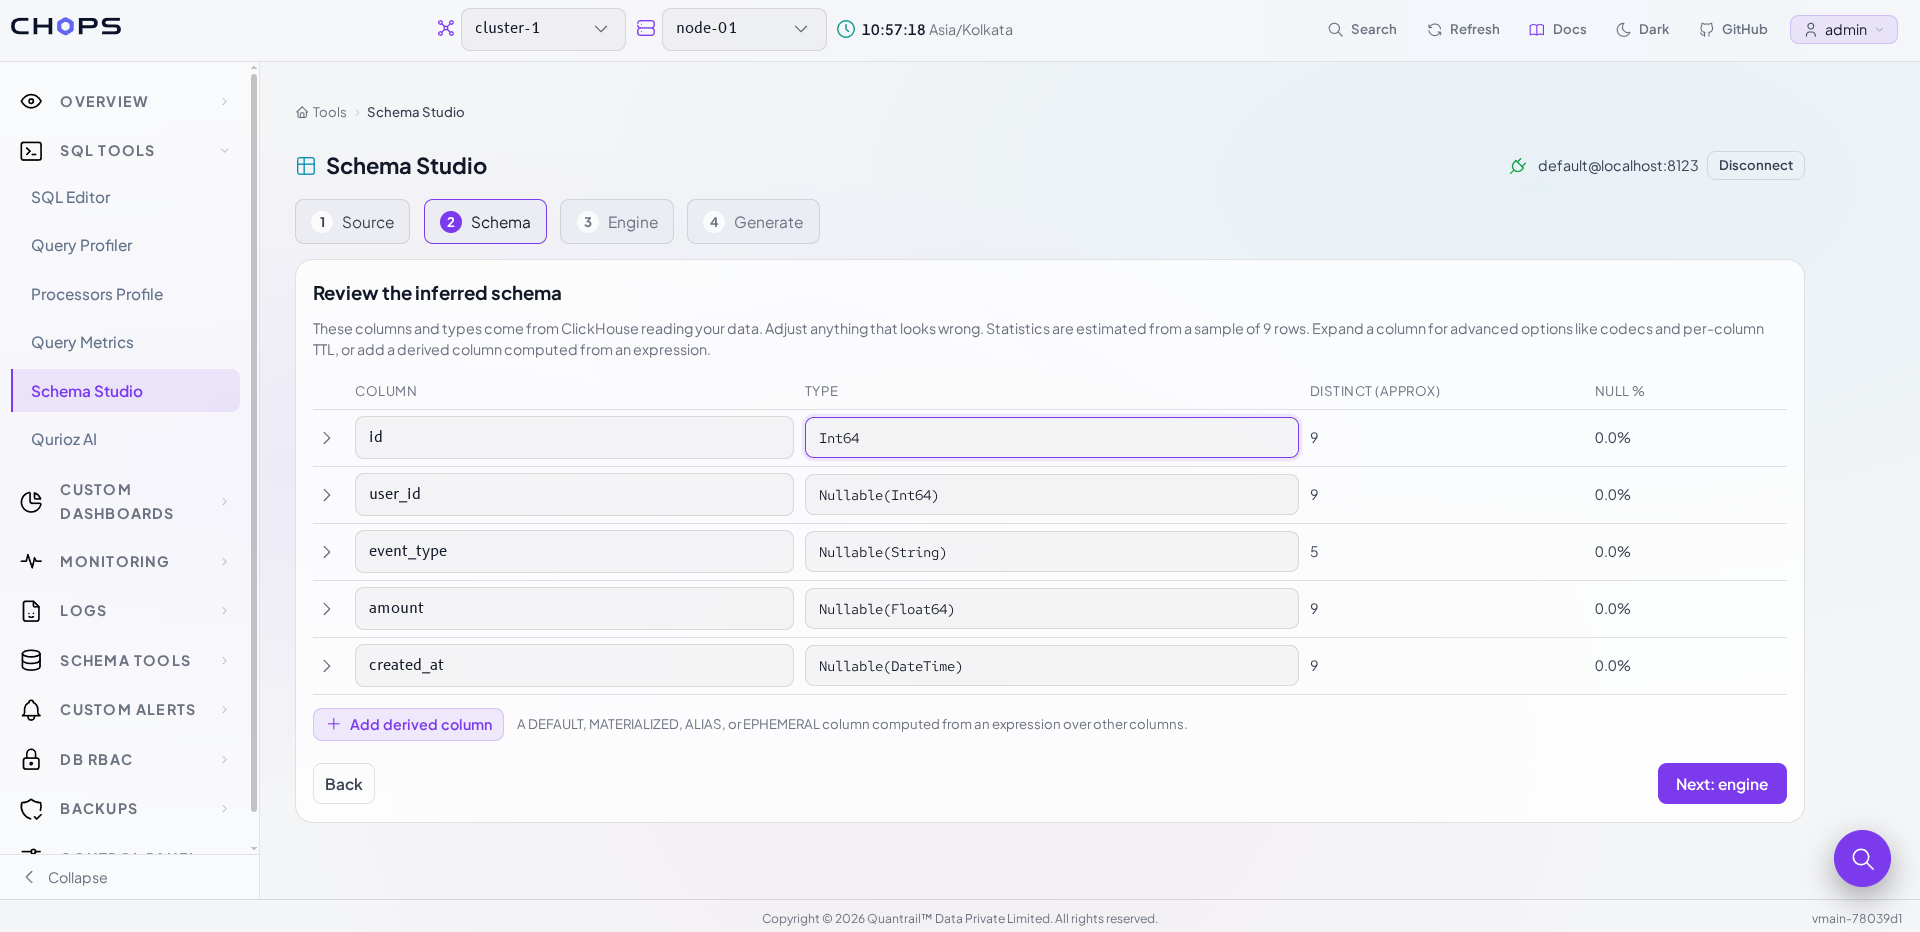
Reviewing and refining the schema inferred from the source data.
3. Define the ClickHouse Table Design
The Engine step is where you configure how the table will be structured in ClickHouse.
Select the database and table name, choose the required MergeTree behavior, and define key table clauses such as ORDER BY, PRIMARY KEY, PARTITION BY, SAMPLE BY, and TTL.
For more advanced designs, you can also configure data-skipping indexes, projections, replication, distributed tables, frequently filtered columns, and additional MergeTree settings.
Note : For MergeTree tables, configure an
ORDER BYorPRIMARY KEYbefore generating the DDL. If no sorting key is required, usetuple()forORDER BY. Schema Studio flags a missing key in the Generate step.
1: Engine Configuration
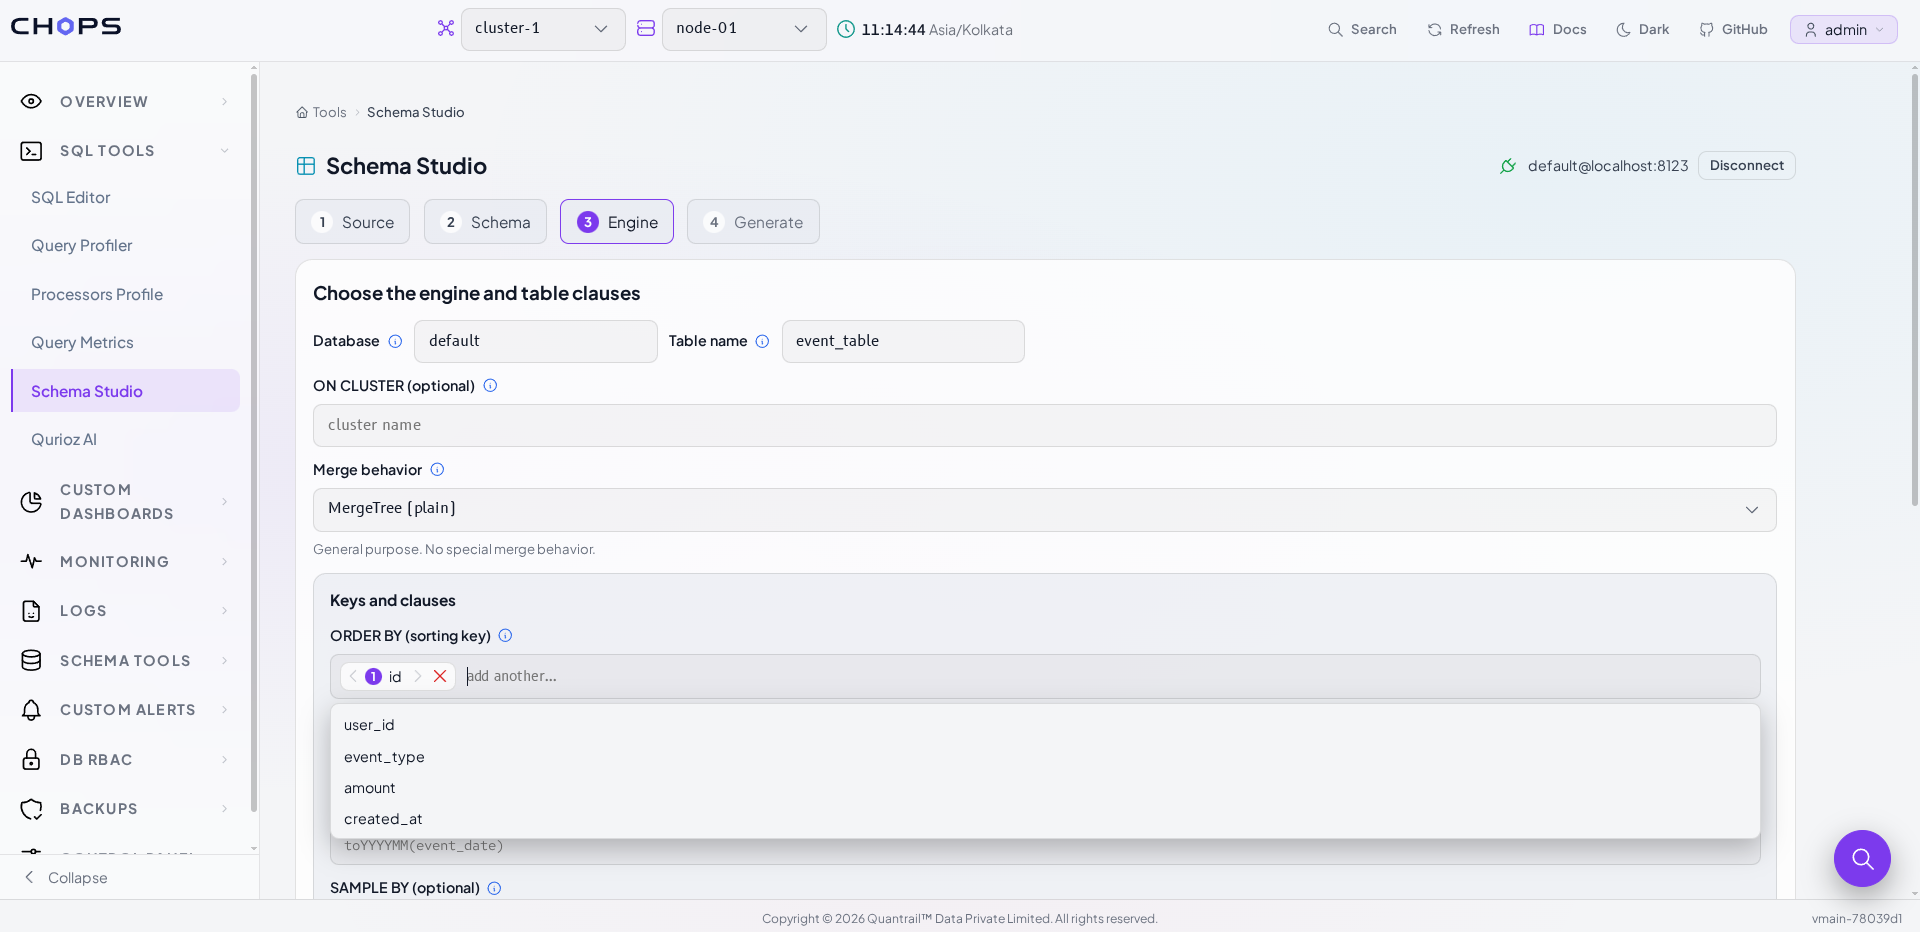
Configuring the MergeTree engine and key table clauses.
2: Advanced Configuration
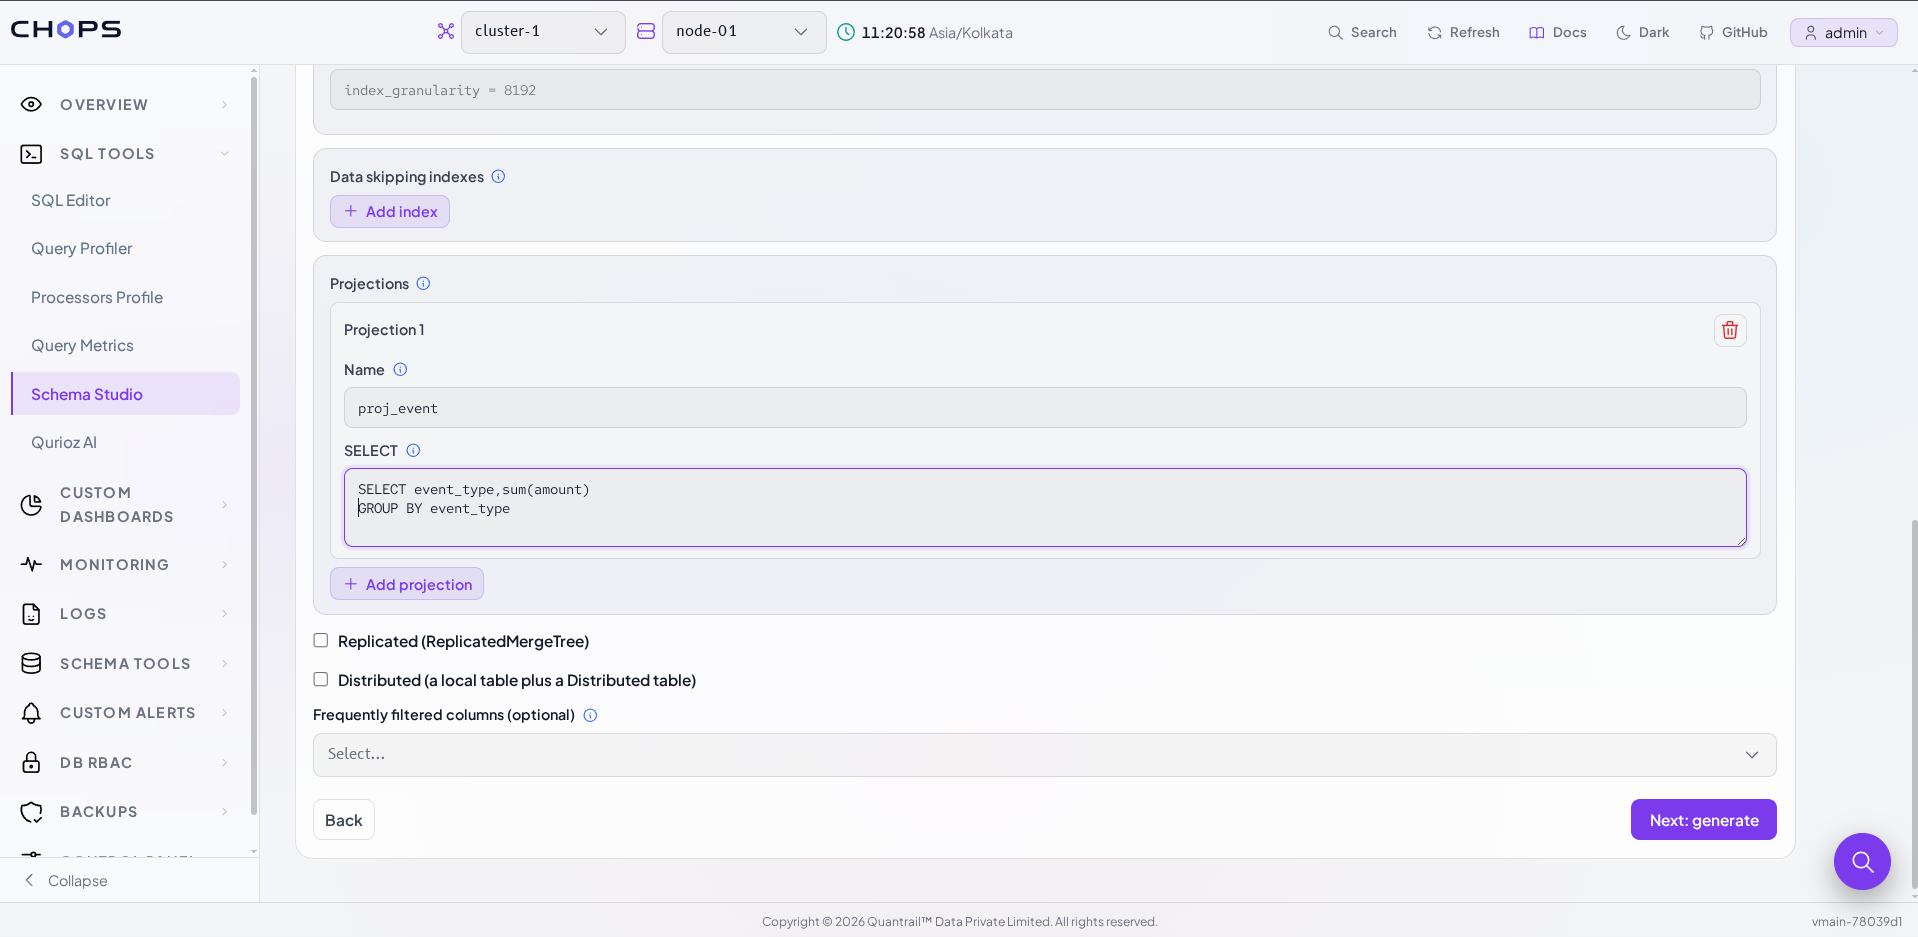
Adding advanced table options such as indexes, projections, replication, and distributed tables.
4. Generate and Validate the DDL
After the table design is configured, Schema Studio generates the corresponding ClickHouse CREATE TABLE statement in an editable SQL editor.
You can review or modify the generated SQL and use Validate to check the DDL before creating the table. If you want to discard editor changes, Rebuild from Form regenerates the DDL using the configuration from the previous steps.
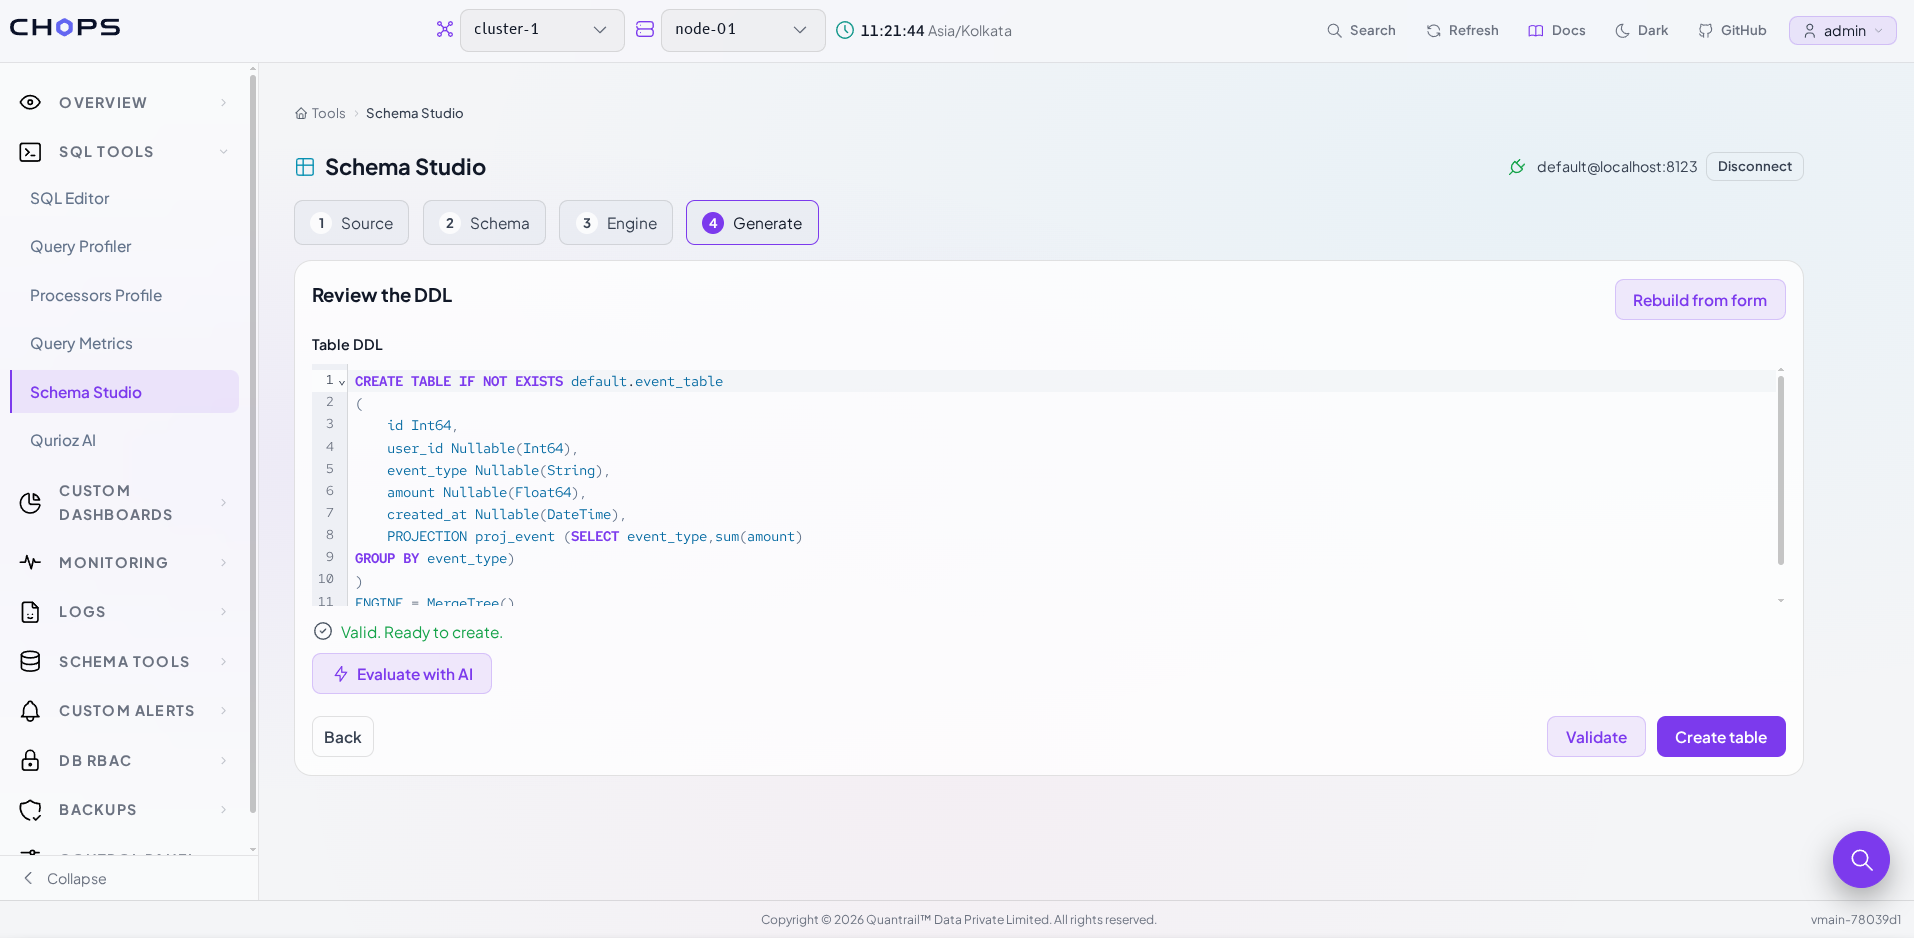
Reviewing and validating the generated ClickHouse DDL before creating the table.
5. Review the Design with AI
Schema Studio also provides Evaluate with AI for an optional review using the supported AI provider configured in CH-Ops.
The evaluation can identify potential improvements related to data types, nullability, LowCardinality, sorting keys, partitioning, codecs, and other table-design choices. Recommendations are presented for review and are not applied automatically.
When a recommendation is useful, Apply to Editor places the suggested DDL into the editor for further review and validation.
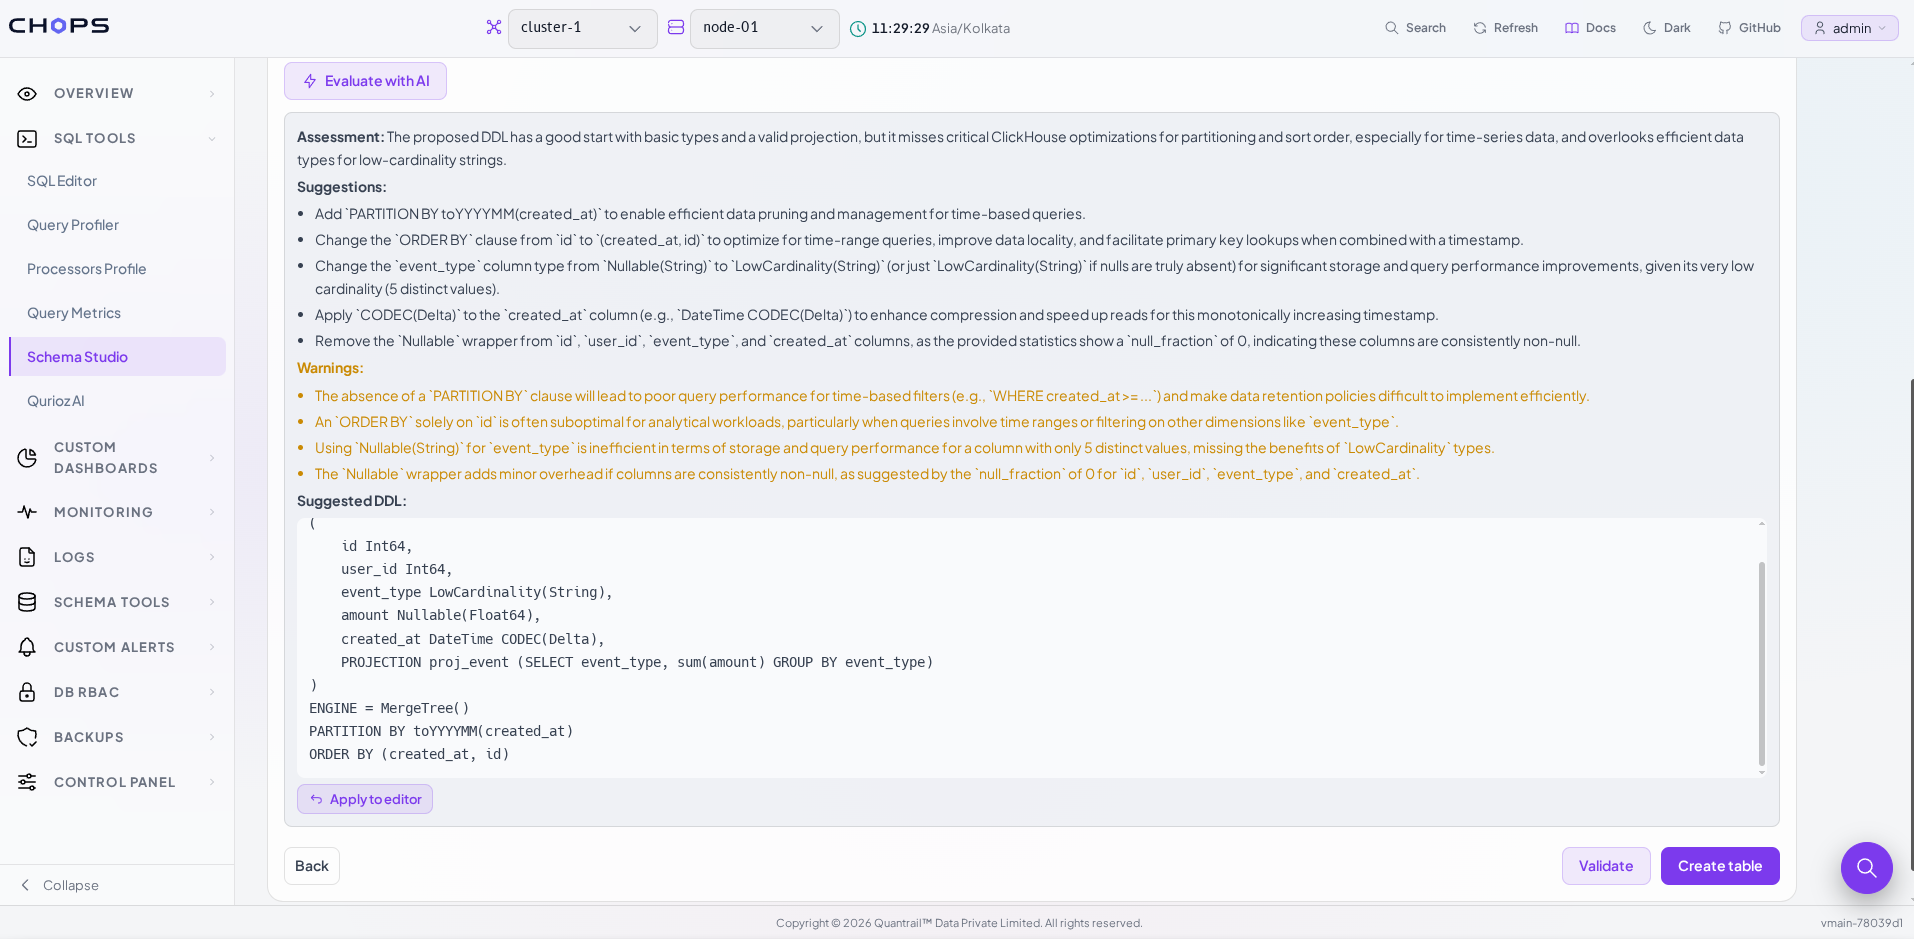
Reviewing AI-assisted recommendations for the table design.
6. Create the Table
After the DDL has been reviewed and validated, select Create Table. Schema Studio displays a confirmation before executing the CREATE TABLE statement on the connected ClickHouse instance.
Only the table structure is created. The source data used for schema inference is not loaded into the table.
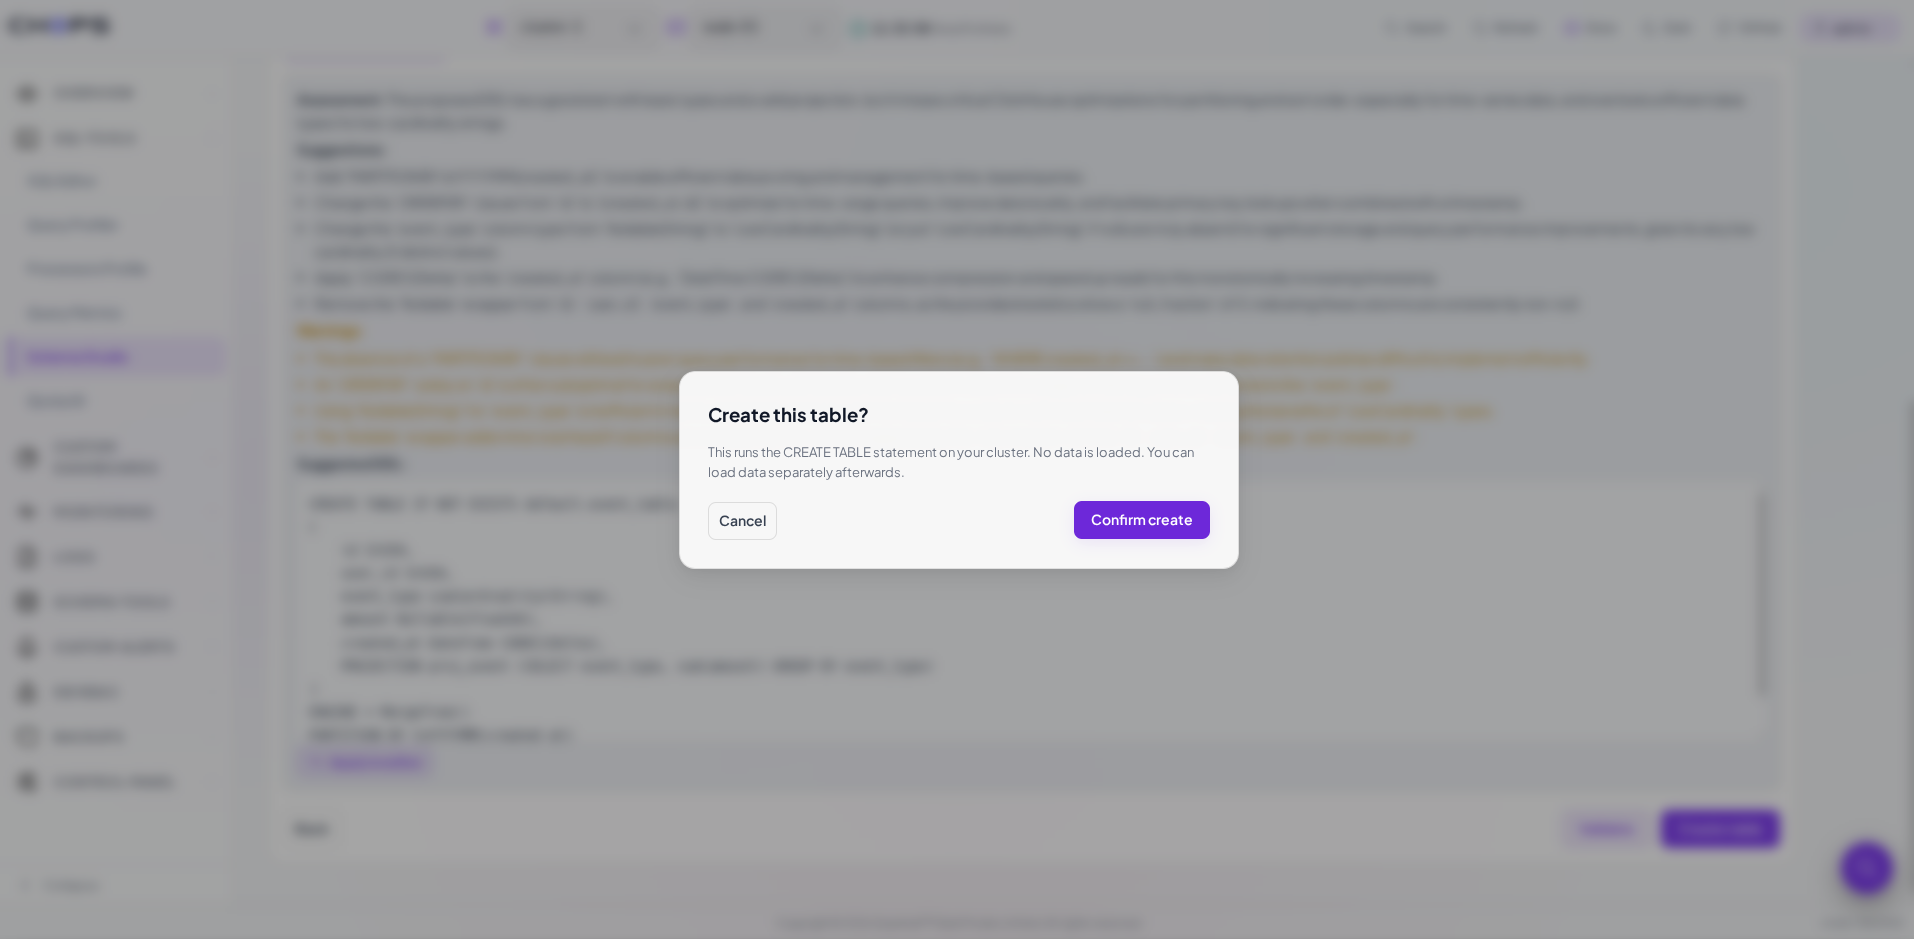
Confirming the final table creation in Schema Studio.
After creation, open the table in the SQL Editor to verify that it was created successfully and review its schema and configuration.
Why Schema Studio Matters
The value of Schema Studio is not simply that it generates a CREATE TABLE statement. It brings the decisions involved in ClickHouse table design into one workflow while keeping those decisions visible to the user.
Schema inference provides a starting point, the Engine step exposes ClickHouse-specific configuration, validation checks the generated DDL, and AI-assisted review provides an additional opportunity to refine the design before creation.
This reduces the repetitive work of translating a table design into SQL while keeping the final DDL available for inspection and modification.
Conclusion
Designing a ClickHouse® table requires decisions that can affect query performance, storage, and how the table behaves as data grows. Schema Studio brings those decisions together in a guided workflow, from understanding the source data to creating the final table.
By combining schema inference, ClickHouse-specific configuration, DDL generation, validation, and optional AI-assisted review, Schema Studio provides a more structured path to table creation without hiding the SQL or taking control away from the user.